Showing posts with label oyster stamps. Show all posts

Monday, 17 February 2014

Cupcake anyone?.......................................


Hey there everyone.

Whilst I was across country in Exeter earlier this year at the Westpoint craft show, I discovered Hobby Art stamps, thanks Heidi.

Well I saw these really cute Cake Stamps and was smitten, Jenny very kindly gave me a set, so here you are Jenny my first card using this set.


Cakes by Hobby Art

Closer View of the Small flowers
I have also used the Memory box Diamond Background

1 mm Diamantes from E bay

Waste from a Martha Stewart punch to create the flowers (Flower Box)

Card is from Anna Marie Designs, Super Smooth Ivory

A wink of Stella in Clear (on Flowers) Also on the image.

Spellbinders Grand Rectangles.


Happy Crafting


Barbara xx

Friday, 1 February 2013

A comment was made...................

Hi there,

I would like to start this post with a thank you, I would like to thank the people who take time to post a comment on my creations, I read every one and they really mean a lot to me.

As I was reading my comments, one really stuck in my head, it was from KarenB


She said "Gorgeous tag Barbara. You're so right saying it's very feminine - so pretty and would look lovely as the centrepiece of a card.

Well I took that comment on board and created a card that I would love to share with you all.


 The result!
Here is what I did to create this card.

Step One.

Cut from Card, two Labels 23 and then emboss them.

Step Two.

Cut and emboss a Grand Rectangle to fit the base.

Step Three.

Whilst the card is still in the Die after it has been embossed , start inking, I used the following colours in the order of:

Antique Linen
Tattered Rose
Victorian Velvet
Vintage Photo ( very lightly as this is quite a strong colour)

Step Four.

Cut out from card the Memory Box "Bella Bouquet" and put to one side, keep the negative as it is going to be used  as a mask, Place the mask where the shadow is to be on the card front, using a Stencil Brush.  Apply Antique Linen until you are happy with the colour tone. Now take the Speckle Stamp, this one is from a Tim Holtz  set called Urban Tapestry and using the Distress Inks, stamp around the edge, starting with the lightest colour through to the darkest Colour.

At this stage apply a small amount of Gilding wax in Gold, this is optional, if you don't have any don't worry.

Remove card from die, there should now be a stamped and inked panel with a lovely clean border going all the way around.

Step Five.

To dye Seam binding cut a length and apply the stain direct to the binding, scrunching up the ribbon as the stain is applied. Dry this with a heat gun when to colour result has been achieved.

Step Six

Adhere the Bella Bouquet die cut, slightly to the side of the masked Shadow, then take the Seam Binding and wrap around the bottom of the card and make a small bow.

Step Seven.

Stamp a verse of Choice, The colour used here is Coffee Archival ink. The stamps that has been used here is an unknown Brand.

Oyster Stamps do have a lovely range of stamps by Our Daily Bread Designs, there are some beautiful verses and sayings on these stamps.

Step Eight.

Using a score Board (I used my Martha Stewart score board) take one of the Labels 23 and place it on the score board horizontally and scored at one inch, this will give a hinge for the card. Apply Scor Tape along the top making sure not to go over the score line, peel backing off and apply the second Labels 23, thus creating your hinged shaped card. ( I prefer making cards this way, as I do not like losing part of the shape if you cut the shape on a pre-folded card.)

Step Nine.

Place foam Pads on the back of the Rectangular panel and adhere on top of the shaped card. Voila you have completed your card.

If you have made a card from these instructions please, let me know as I would love to see what you have created, you never know I may even send you a goodie or two. My contact button is at the top of my blog.


So a huge thank you goes out to KarenB, If you are reading this, please send me an e-mail via the link at the top of my blog, I would love to send you a few little goodies as a thank you.


Another huge thank you must go to Oyster Stamps as  without them I would not be able to show you all these lovely ideas.


Here is a list of supplies I used: All of which can be purchased from Oysterstamps


Memory Box "Bella Bouquet"
Spellbinders Grand Labels 23
SpellBinders Grand Rectangles
Distress Ink, in the following Colours, Victorian Velvet, Tattered Rose, Antique Linen and Vintage Photo.
Scor Tape

The Following items are from my stash:


Hand Dyed Seam Binding (Tattered Rose )
Gold Gilding Wax
Verse Stamp (maker unknown)
Cream Card (Anna Marie Designs)


Happy Crafting


Barbara xx

Sunday, 18 November 2012

A Tutorial for you................

Hey there,

Recently I ran a workshop at some paper craft shows across the country for Oysterstamps. In these workshops the attendees would learn how to make this card using the Martha Stewart Score Board and Memory Box Dies.

   
Box Frame card.


Please be gentle with me, as this is the first time I have written a Tutorial for my Blog; I do hope you enjoy it.

 So if you did not get to attend this particular workshop, or indeed would like to  know how to create this card , scroll on down................


OK here goes, take an 8x 8 square of card stock, I used white for my example here, but you can use patterned card if you wish.


Now you need to score on all four sides of your square on the following measurements, I used a Martha Stewart Score Board.

3/8" inch, 3/4" inch 1 5/8" and 2" inches

Score Lines


Once you have scored on all four sides, remove the four outer corners ( marked with pink dashes) then cut along the centre cross ( Marked with pink dashes)


This is what you should have now.


If you wish to add colour or stamped images to the frame, now is the time to do this.


Time to Assemble!


Fold along the scored lines. As per the picture below.


Now staple the four corners together, this forms a lip in which you will be able to adhere the frame to a card blank later on. I used the Tim Holtz tiny attacher to staple mine together as it fits into the folds really nicely.


Stapled corner


This is what you should have now.


Staple or DST the triangles to the lip.


Now turn the frame over so the remaining corners are flat on a cutting surface, and trim these off.


In order to finish this card off, you can cut a piece of card just slightly smaller than the frame and adhere this to the back and make a stand for it. Alternatively you can adhere the frame to a card blank. 


Here are a couple more examples for you.


This frame has had some die cuts glued onto of the frame after scoring, then Metal tape was applied over the top. I then burnished around the Die Cuts to make them look embossed. 

Once I had completed the burnishing, I applied some Acrylic Paint, and wiped some of it off before it dried completely and sprayed it with some Ranger Perfect pearls spray and left to dry.

I then assembled the frame, stamped and inked the back panel and adhered this to a card blank. I added some die cut rolled roses, these were cut with Ten Second Studio metal sheets and some Branches (Martha Stewart Branch punch was used here)


Rolled Roses and Scroll


This card I used a sturdy patterned Cardstock, I made my frame and adhered a stamped, coloured image on to the back panel (whimsy). I then made a  Poinsettia with the Spellbinders Die and cut a couple of Holly Flourishes ( Cheery Lynn) in Gold Mirri Card.


Poinsettia and Holly Flourish.
 
I do hope you can follow this tutorial, If you have any questions, you can e-mail me using the button at the top of my blog.

Happy crafting


Barbara xx                                           


Thursday, 16 August 2012

Back from my Holiday......................

Hi fellow crafters,

If you have been away like I have, I hope you had a great time. We went to the New Forest for a couple of weeks , though it was a bit damp on occasions we have a nice and relaxing time.

So as soon as I got home and all the washing was done, I hid in my craft room for three days and made this.....................................


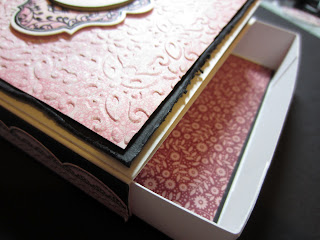
American style mail box

close up of the bottom edge

Mountain lily Fairy by Whimsy, coloured with Promarkers

End flap with Just rite bauble stamp

How I connected the mail flag, K and Co Brad.
Can you tell I missed my Craft room!

Ok I used the following items to make this

 I have linked to the products I used to Oyster Stamps where I can. The Ink Pad and Memory Box dies are available in store as well.  The rest is from my personal stash, that I am trying to use up!

This will be doing the tour of the Sincerely yours shows across the country, I do hope you will come by and see it.

Now if you would like to make this, I will be having a Workshop very soon at Oyster Stamps in Rochester. Details coming soon!


I love reading your comments,if you have any questions please leave a comment and I will try my best to answer them.


Happy Crafting

Barbara

Saturday, 21 July 2012

I would like to share with you.......................

some crafty goodness with you all.

Today, I met up with my friends today for a wonderful crafty day, we spent a lot of the time putting the world to rights, but I did manage to get a bit of crafting done!

I coloured in Silver Fairy with TH Distress Markers onto Water Colour Paper (from my stash ), I also stamped another fairy and coloured the wings, then cut these out, then I cut her out using Spellbinders Floral Ovals, as she is a bit big for the die, I decoupaged a set of wings onto my panel as I lost a bit of her wings, in the die cutting process.

I stickled ( is that a word ) her wings and dress with Star Dust Stickles, my most used colour, well diamond gets used a fair bit as well.

The background was created using the MS score board, now if you have not got one of these, WHY NOT! lol. I love mine. I distressed the edges with a craft knife, well I would of used my distressing tool, but it seems to have fallen into the deep pit called my craft room!

I added a distressed strip of patterned paper and a row of Lace and pearls, before layering the fairy panel on the top. I used my MS Vintage Lace PATP set to create my card base.
Then finished it off with a few flowers from my stash and a few punch outs using the Martha Stewart branch punch.


I just love the way her wings pop off the page!


Closer look at her wings
Products used, available from Oyster Stamps
  • Martha Stewart PATP Vintage Lace
  • Whimsy Stamp Silver Fairy
  • Tim Holtz Distress Markers
  • Martha Stewart Score Board
  • Spellbinder Floral Ovals
  • Martha Stewart Branch Punch
  • Stickles
Happy Crafting

Barbara

Tuesday, 3 July 2012

Back with a bang......

Hi there,

Well as the title says I am back, with some cards to show you.


Just recently I have found a love for colouring with promarkers, I am not a professional by any standards, I just love sitting here in "The Hut" and colouring to my hearts content.

On this card I have used Romantic Rectangles by Spellbinders, Stampavie "Pia", Pearls, Promarkers and mulberry Roses. All products are available from Oyster Stamps.


Romantic Rectangles


On this card I have used Patterned paper, with a criss Cross pattern that I scored using the Martha Stewart Score Board, Memory Box Grapevine Wreath, Martha Stewart Branch Punch, Spellbinders Banners die set and pearls from my stash, the rest of the products can be found at Oyster Stamps.

If you'd like to replicate this card, you can make the flowers from a die by Memory Box called Floral Delights and the Tiny Butterflies you can use Butterfly Delights also by Memory Box.

Memory Box, floral Wreath
 On this card I have used Floral Ovals by Spellbinders, Patterned Paper, Mulberry Flowers,Whimsy "sunkissed" Stamp and Promarkers, I did prick around the edge of this card using the Tim Holtz Clear Ruler. All products are available from Oyster Stamps.


Well that will do for today, I do have more to show you in the next couple of days. I hope you will come back to see what else I have created.

Happy Crafting

Barbara.


Thursday, 12 April 2012

Part deux................

Hi fellow crafters,

Welcome to part deux of my Busy busy week!

On Wednesday, I went to Oyster Stamps to show a lovely bunch of ladies and not forgetting Michael how to make a Triple stacked easel card, using Spellbinders Nestabilities.

Here are a couple of the cards that were made by some of the ladies.


 Happy Crafting

Barbara xx


Wednesday, 4 April 2012

Hey there fellow Crafters,

I hope you all have had a great day, I did.

I spent the Morning at Oyster Stamps showing a group of lovely ladies on how to use the JustRite Stamps and matching dies. once they some playtime with the products, I gave them a challenge. I asked them to make this

I have to say, all the ladies took the challenge up and successfully made the main component, I handed around various 6 X 6 paper pads for them to decorate the exterior.

Happy Crafting

Barbara xx