Being a member of the Design Team for Ali Craft, Ali from Ali-Crafts sent me the most scrumptious collection of stamps by Lindsay Mason to have a play with and design a card Tutorial for you all.
Here are the sets I have chosen to use today....
 |
| Emily and Steampunk Sarah by Lindsay Mason |
 |
| Steamed Up by Lindsay mason |
and here is a picture of the finished card.........
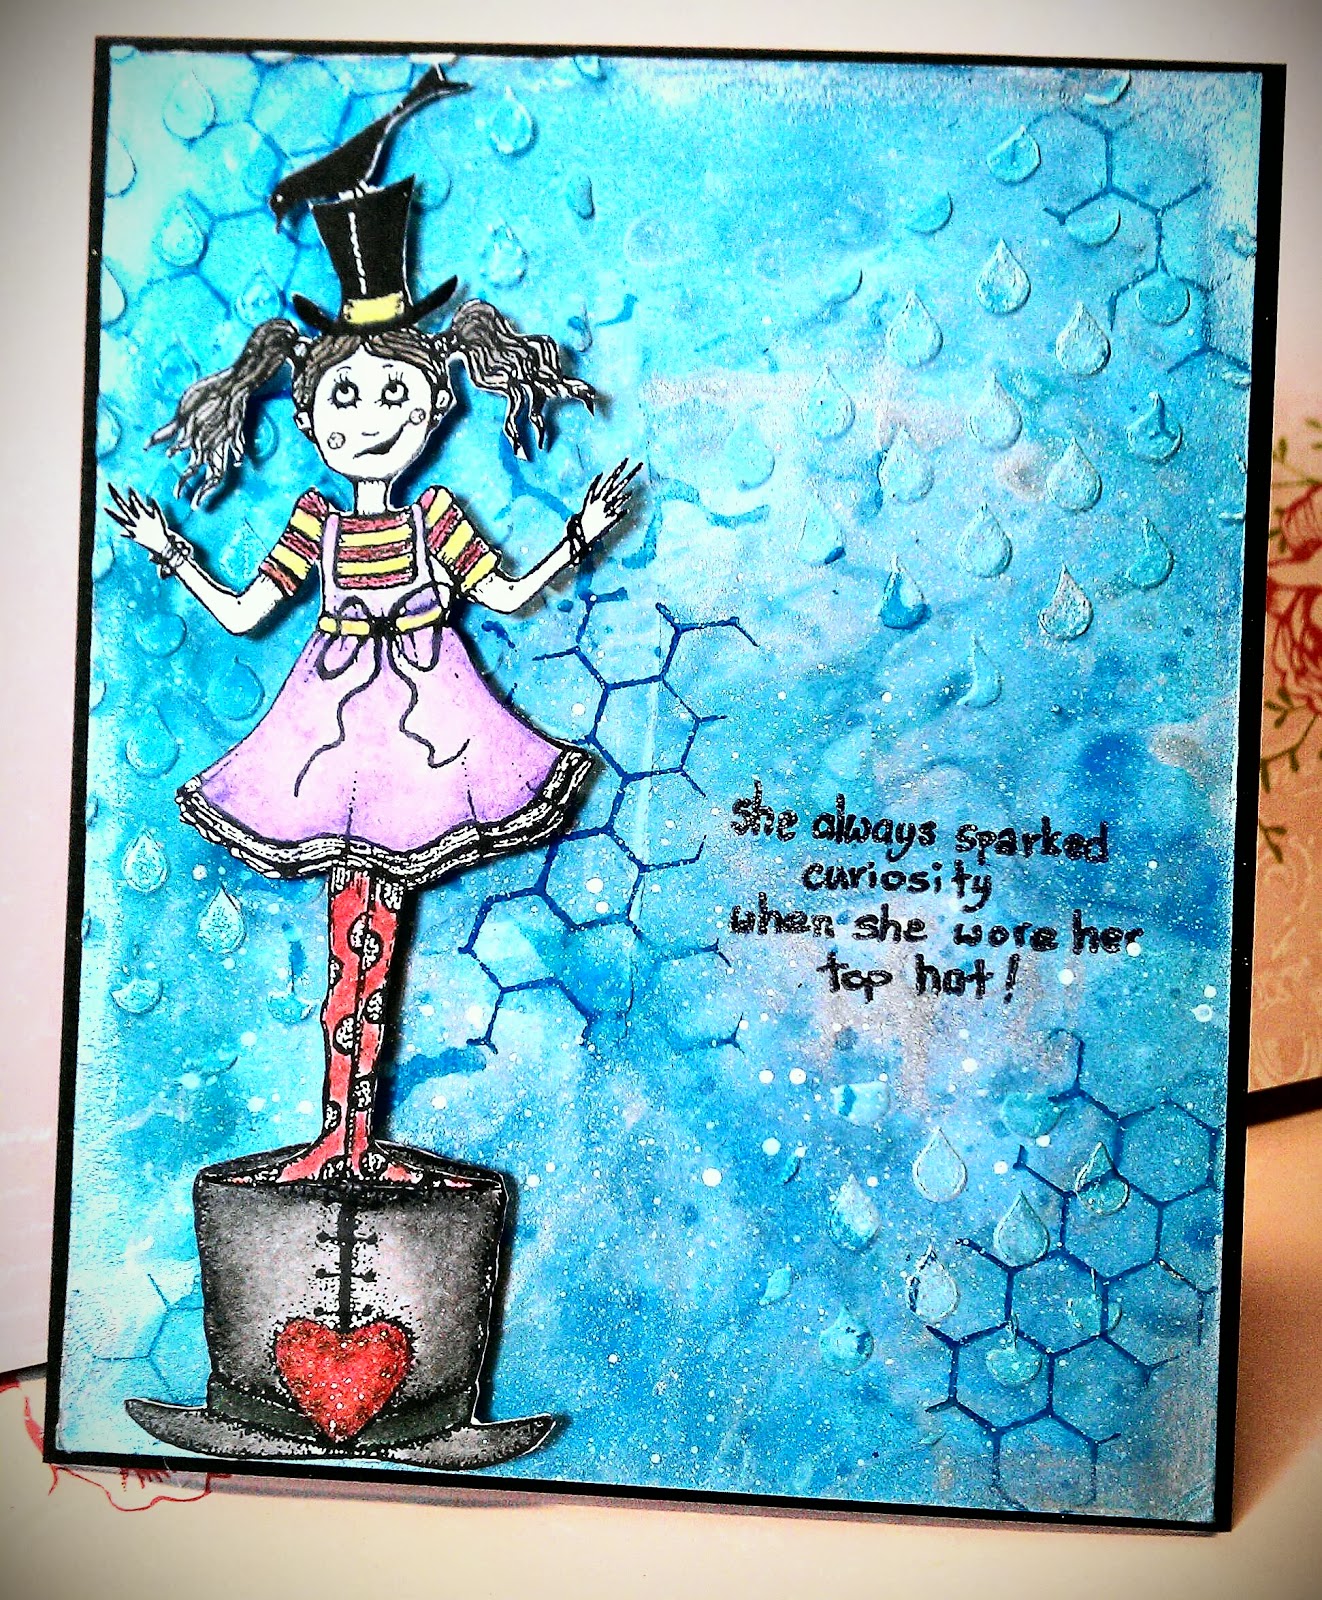 |
| I love the texture from the Grunge Paste. |
Here is what you will need to complete this card;
Emily and Steampunk Sarah by Lindsay Mason
Steamed Up By Lindsay Mason
White Card
Black Card
Distress Acrylic Paint in Broken China, Weathered Wood, Salty Ocean and Brushed Pewter
Archival Ink in Manganese blue and Jet Black
Prima Mask Rain Drop
Grunge Paste
Dylusions Spray White Linen
Treasure Gold Silver
Tim Holtz Mixed Media Stamps
Foam Pads
Double Sided Tape
Scissors
Palette Knife
Rock Candy Dry Glitter by Ranger
Glossy Accents
Craft Mat
Step 1
Cut a piece of White card to 4 1/2 x 5 1/2. Apply random strokes of Distress paint including the metallic Pewter to a craft mat and spritz with water, then drag your card through the paint untill you are happy with the coverage, zap with a heat gun till dry.
Don't forget to clean your Mat, as you will need it in the next step.
Step 2
Grab your grunge paste and palette knife, put a small amount on to your craft mat. Add a blob of Salty Ocean Distress paint along side and mix them together untill the two have blended.
Lay your mask on top of your painted card and with the palette knife apply through the mask in small areas. Leave to dry.
Remember to clean your mask and Palette knife before the paste sets hard!
Step 3
Take the Archival ink pad and Honeycomb stamp from the mixed media set and stamp randomly onto your card, I did not use an acrylic block to stamp, I just held the stamp in my hand as I prefer the look you get. Blast with a heat gun to dry.
Step 5
On a spare piece of white card, I Stamped "Emily" in Jet Black Archival Ink and coloured her in ( I used Prisma Pencils, but you could use distress paints watered down). I also used the Top Hat from "Steamed up" once again I coloured it in using my Prisma Pencils, I then applied Glossy accents to the heart and sprinkled some Dry Rock Candy Glitter and left to dry.
Step 6
Using a pair of fine pointed scissors I fussy cut Emily and the Hat out from the card, applied Foam pads to the back of each piece and adhered them onto the left hand side. I then inked up the verse from Emily and Steam Punk Sarah in Archival Jet Black and stamped on to the right hand side, where there was a clear space.
Step 7
Take your Treasure Gold Silver and apply it around the edges of your card, I also applied it to some of the raindrops to highlight them, leave it for a few minutes and then you can buff it gently, this will give the wax a nice shine.
Take your Black card and cut it to 4 5/8 x 5 5/8 place Tape onto the back of your decorated card and adhere to the piece of Black card you have just cut. You can then mount this panel onto a card Blank.
I do hope you enjoyed this Tutorial, all of the products listed are available from Ali-Crafts.
Happy Crafting
Barbara x


