Well the Gauntlet was thrown down to the DT of Ali Craft to include Butterflies on our July challenge project.
So after a few days mulling the possibilities, I went ahead and created this Tag.
 |
| Butterfly Tag |
I tried a new technique with this tag with this challenge. I followed Tammy Tutterow's tutorial on how to use Tim Holtz's Frosted film in a different way. I really love this technique, it is difficult to see on my picture, the tag has become translucent while the pattern from the paper is still there.
Please go to Tammy's Blog, to follow the tutorial. She has some great ideas on her blog, I just wish I had a smigen of her talent!
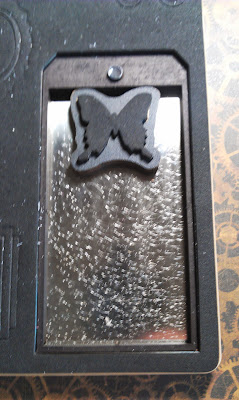
Now once I had made my base for my tag, I took a piece of Acetate (Tammy used Shrink Plastic, sadly I don't own any) and Die cut a Tag using Tim Holtz's Tag Die. I then took a Movers and Shapers Butterfly and placed it inside the Tag Die and placed my Frosted film base on top and ran it through my Big Shot.
 |
| Butterfly in position before Film is placed on top. |
I now had a tag, with a butterfly aperture, I also cut out a matching butterfly from a scrap piece of patterned paper for me to use later on.
I then adhered the Frosted film on to my Acetate Tag, then to give the tag some texture. I ran it though my Big Shot in a embossing folder. This also helps the Film stick to the Acetate a lot better.
 |
| See the Texture |
Using Victorian Velvet and Vintage Photo Distress inks I edged my Tag and then took my favourite product of all times Treasure Gold, just love this stuff! You can see in the photo above how I added some Classic along the edge of my Tag.
With the additional butterfly I cut out from some Scrap patterned paper, I ran this through my Big Shot in an embossing folder, highlighted the edges with Treasure Gold and Vintage Photo Distress Ink. Then using a strong Glue I adhered it to the Apeture at the top of my tag. Then added a Pen nib for the body of the butterfly.
 |
| Add caption |
I then decided to add some lace to my tag, I took some wide lace (from my stash) and dyed it using Distress Stains In Antique Linen and Victorian Velvet, then I spritzed it with water for the colours to mute and merge slightly. Then I gave it a blast with my Heat Gun.
 |
| Coloured Lace |
I stamped Life Moments inside the frame, from the stamp set by Tim Holtz called simple sayings, cut this out and covered it in Crackle accents.
I glued the lace to the bottom of my tag about half an inch up, then I added a string of flat Back Pearls in Ivory (from my Stash). Once they had dried I adhered some Pre-Made paper roses and a couple of Branches ( Martha Stewart Punch from my stash) .
I also added some Seam binding that I had dyed using Tattered Rose Distress stain through the hole at the top of my tag. As the final touch I adhered the saying on top of the lace.
I do hope you liked my entry for July's Challenge. Most of the products mentioned are available from Ali Crafts. If you cannot see what you are looking for, please give Ali a call.
Please join in on the Challenge, show Ali and the Design Team what you can make with our challenge. Just go to Ali Craft Blog after the 6th July. This gives you lots of time to be creative and post your Project.
Happy Crafting
Barbara
It's lovely Barb ,glad to see you back to your old self ,it shows in your crafting g
ReplyDeleteHugs xxxx
Love it Barbara, beautiful as always x
ReplyDeleteThat is lovely, I especially like the pen-nib butterfly!
ReplyDeleteJust love your butterfly tag Barbara
ReplyDeletelooks even better up close
Next ali-craft blog challenge starts on saturday 6th, can't wait to see everyone's work
ali x
Gorgeous tag.
ReplyDeleteCxx