Showing posts with label Ali-craft. Show all posts

Tuesday, 15 April 2014

Let's alter it......................................

Hi there,

I am back with the second project for Ali-Craft DT, using the delicious papers by Prima.


Stationer's Desk- Collection Kits
Prima Stationers Desk.
I decided to make some stationary items, things that people may use on a day to day basis. So my first piece is an altered Chipboard Panel, you can buy these from Ali-Craft you may need to call them, as I am not sure they are on the website.


So here it is.............................


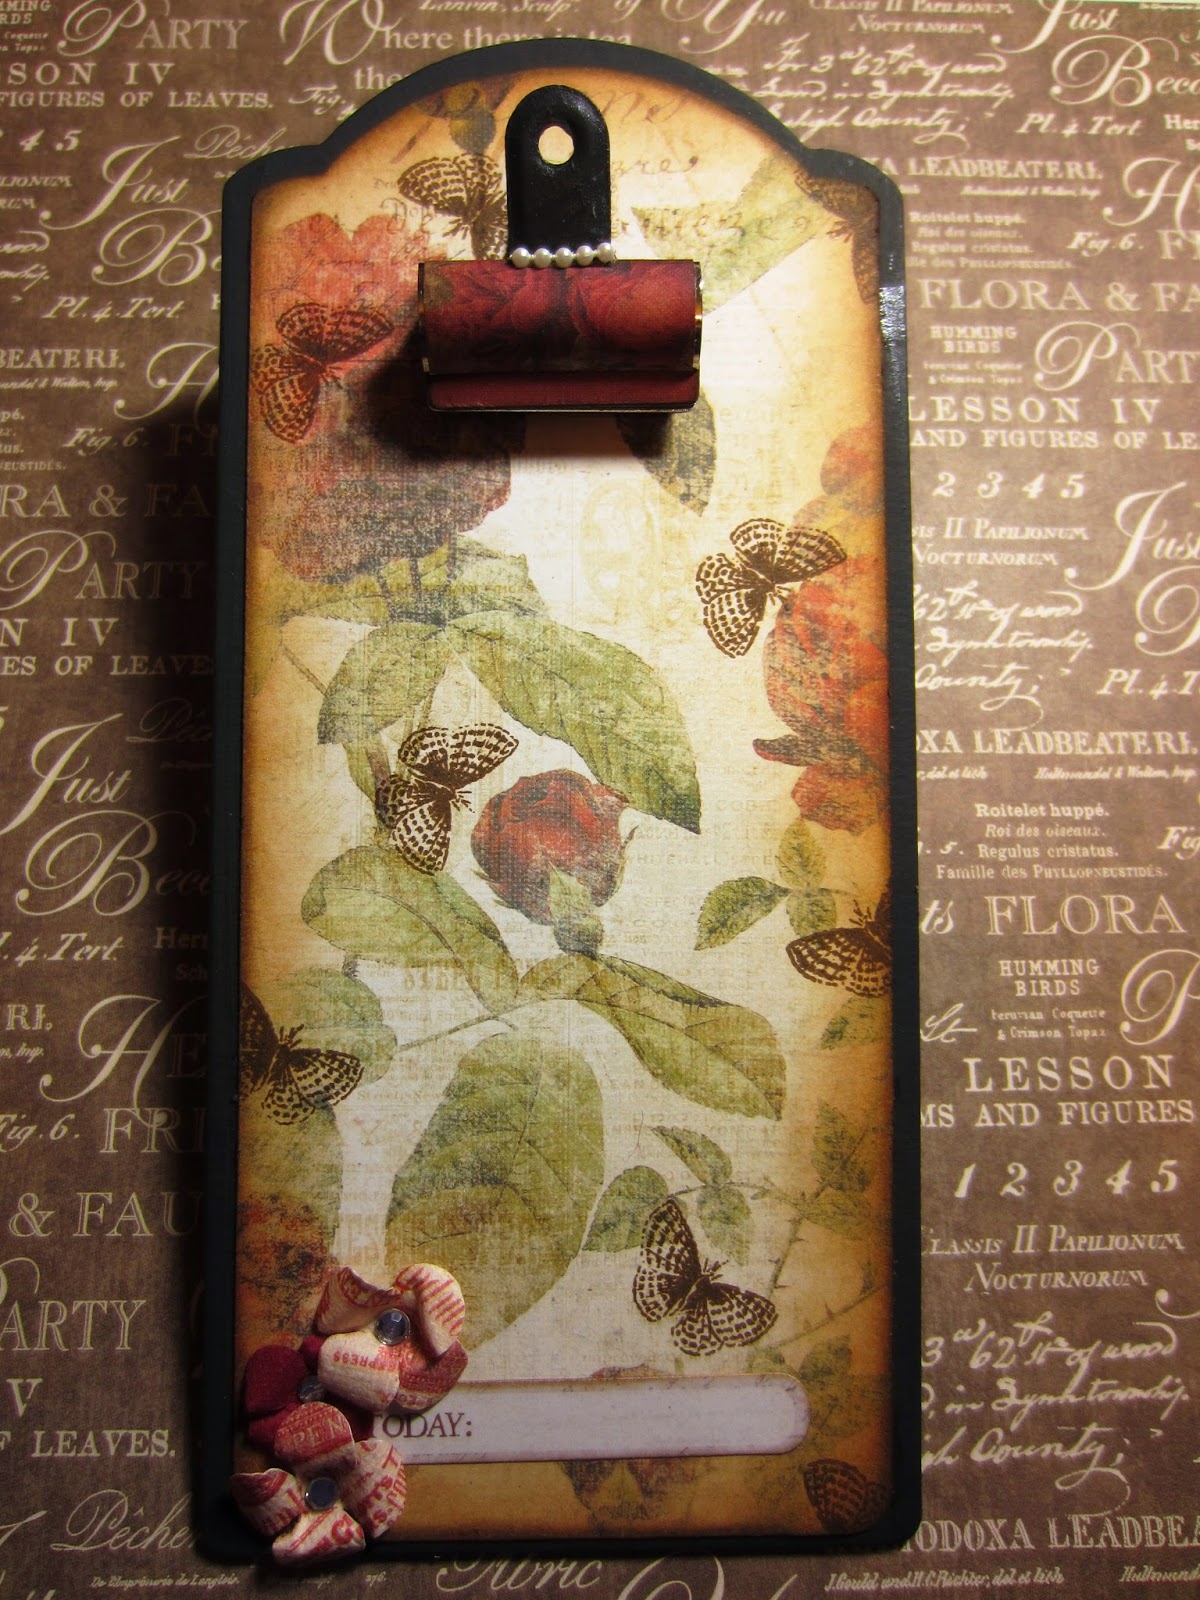
Note Pad holder.


I took the Chipboard Panel and gave it a coat of Espresso Paint Dabber (it's about the only one of mine that has not dried up!)

I then drew around the panel on a sheet of the Prima Paper, then trimmed it so I would get a border around the panel. I coloured the edges of the paper with Antique Linen Distress ink and then stamped a few of the Butterflies using Potting Soil Archival Ink.

I had a rummage through my stash and found a Bulldog clip, I took it apart and coated it with some Glue and Seal by Ranger, then painted the handle with some Espresso Paint Dabber, whilst that was drying I Covered the barrel of the clip with some scraps of Prima paper ( waste not want not). once it was all dry I re-assembled the clip. 


Altered Bulldog Clip.


I adhered the paper to the panel making sure there was a even border, I then pierced a hole near the top, aligned the hole on the Bulldog clip over it and attached it with a fancy Brad.

I choose a sticker from the sticker sheet and placed it near the bottom and added some of the smaller Prima blooms that match the collection, to give it a bit more dimension.


Flowers from the Prima Collection.


Well I hope you all enjoyed this weeks project.

Happy Crafting.


Barbara

Monday, 7 April 2014

The art of Prima.....................................

Hi there,

Well I have been absent for a while, my apologies, I have been a bit busy working on a few things, mainly ideas for future workshops and my Design Team projects.

Any way It is my turn to show you all, what I have created for Ali-Craft design Team for April.

I was given the beautiful 12 x 12 kit from Prima called "Stationers Desk".
It is stunning, a palette of Browns, Beige's and Reds, my favourite colours ahhhhhhhhhh. I was also given the mini stamp set and some small paper flowers both of which are from the same collection.


All of these products will be available from Ali-Craft stand at Alexandra Palace this coming weekend.


So here it is


Stationer's Desk- Collection Kits
Available here

It is full of Papers, Note card's and stickers including Alpha's.

So here is my first project to show you. I decided that I would make a card, using the gorgeous 12 x 12 papers and some Dies.


Stationers Desk by Prima.


I cut two large shaped pieces of card to create my card, scored one at 1" from the top edge to create the hinge and glued them together.

Then using the next size die I cut a layer from the Prima Stationers desk and then edged it using DI ink in Antique linen. Randomly stamped over with the Butterfly in Potting Soil Archival Ink, then adhered to the card using Foam pads to give a bit of dimension.

I proceeded to cut some spiral flowers from the card stock and rolled them to create roses and added a diamante in the centre.

Whilst they were drying, I cut a swirl from some scraps of the Prima papers, then cut a few narrow strips, made them into flag shapes. I stamped a verse from Paper Artsy ELB05 and heat embossed it using Wow powders and then distressed the edges.

I checked my rolled Roses were dry and went onto assemble my card, I adhered the die cut swirl  first then added the flags to underneath the stamped panel and attached it to the card once again using foam pads for dimension. Then I added the roses, using wet glue and left to dry.

Well I hope you have enjoyed my first project using the Prima stationers desk collection, please come back next week, where I will have another project to show you.


Happy Crafting

Barbara xx

Saturday, 8 February 2014

Ali Craft Challenge..................................

This month is LOVE...................


So I have been a busy bunny since coming back from Westpoint, where Heidi and I held workshops on behalf of Ali and Iain.

Here is my entry for the challenge which starts Today.


Don't panic it does fold flat to fit into an envelope.
I hope you all like it and inspires you all to create and send in your entries.


So hop on over to Ali-craft click on the blog icon and add your entry


Happy Crafting


Barbara xx

Wednesday, 16 October 2013

Jofy by jove.................


Hi there is my turn (Barbara) to showcase a product from Ali-craft as part of their design team.

I was asked to use some stamps designed by Jo-Firth Young, the set I am using is Jofy12.


Here is my project, I know it's another tag, there is a reason for this. I wanted to use a variety of mediums and I needed something that would stand up to the challenge! In this case a Chipboard tag came to my rescue.................

Here is a list of Products I used to create this tag.


Jofy plate 12
Archival ink in Jet Black
Glue and Seal in Matte
Grunge Paste
Crackle Glaze
Vintage Lace, Beach Hut and Snowflake Fresco Paints
Cut and Dry Foam
Water Colour Crayons (my stash)
Treasure Gold in Silver
Stencils
Gesso


All products I used are available from Ali-craft, with the exception of the water colour crayons.

If you cannot see the product on their website give them a call..............


Now don't go thinking that it is just a simple tag, it is not. There are a few processes I used in order to achieve the look I wanted!


Step one.

Take your Tag and slap a good coat of Gesso onto it and let dry.


Gesso going on.


Step Two.

Paint a base layer of colour, I used Beach Hut mixed with Snowflake white Fresco finish Paints by PaperArtsy.


You can see the ratio approximately here.


Step Three.

Once your base layer has dried, I gave mine a blast with my heat gun to speed the process up.
Take the Crackle glaze (I used the one by Paperartsy.) following their instructions, I scraped a thin layer onto my tag using a palette knife and let it dry.

Step Four.

Once the crackle had dried, I took a piece of Cut n Dry foam and sponged on some Vintage Lace Fresco paint, by using a sponge you get a much smaller crackle, id you were to use a paint Brush you get a more open crackle effect.

see the crackle effect here.

Step Five.

Now grab hold of any stencils you'd like to use and your favourite inks, I like to use the Distress Inks when I am using stencils. Now decorate the tag, keeping it fairly subtle as you wan the stamped images to be the main focus.

As you can see I have used a variety of stencils here.

The blue criss cros was stamped with Blue Archival ink.


Step six.

Now take some Grunge Paste, I used Paperartsy's on my tag. Using a brick stencil I scraped some paste onto my tag in the lower left hand corner. I wanted to give an impression of a ruined wall.


Once this had dried, I noticed that the paste had cracked, this was due to the crackle paste underneath, that’s what I call a happy accident !!!!

I then added some colour on top of the  paste.

Look at that crackle effect.

Step Seven.


On to some old book paper I stamped using Archival ink, the main flower from the stamp set and put aside.

I then stamped my images onto my tag, onmce again using Archival ink as I wanted to use some water colour crayons to colour the images.

From the previously stamped flowers I coloured them in using my water colour crayons and cut them out. I the adhered them onto the tag with Glue and Seal in matt


Stamped onto Tag

Image stamped onto old Book paper and coloured.
Adhered to the tag using Glue and Seal Matt
I then stamped the wording onto some old book paper and adhered to my tag using the Glue and Seal again.


Step Eight.

Once everything had dried I added a touch of Treasure Gold in silver, around the edges and some on to the Grunge Paste ruined wall.


Many thanks for looking at my project.

Happy Crafting


Barbara.